Costco’s Kirkland Signature Chicken Pot Pie is a beloved comfort food, offering a convenient and delicious meal for families.
It requires approximately 90-105 minutes of baking at 375°F, initially covered with foil, then uncovered for browning.
Overview of the Product
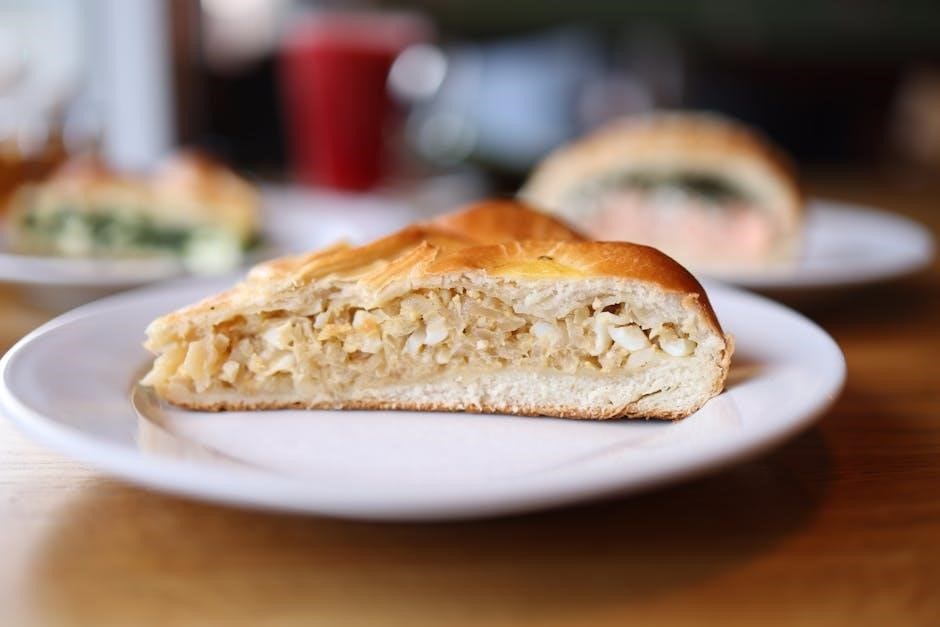
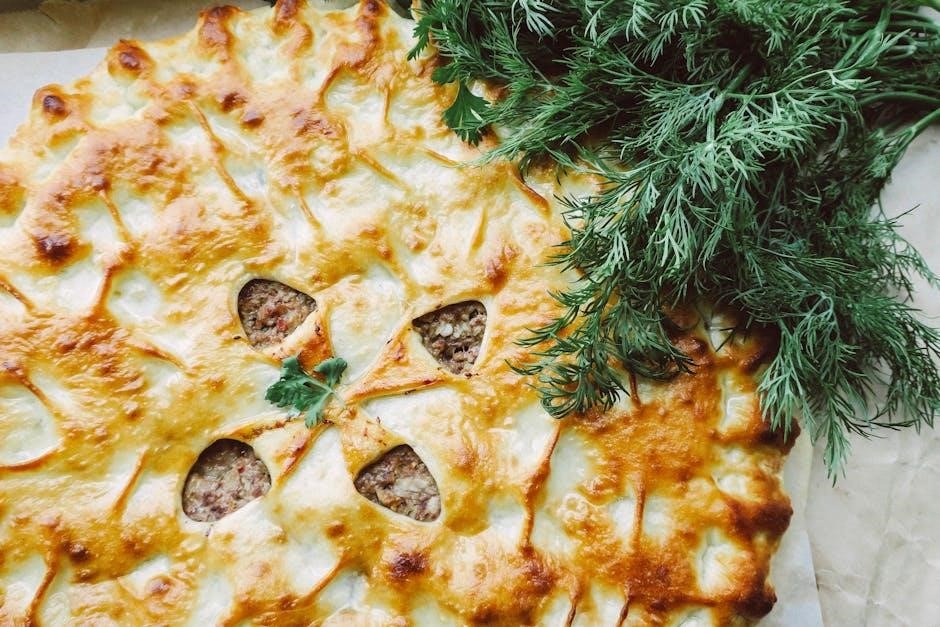
Costco’s Chicken Pot Pie is a substantial, family-sized frozen meal, typically weighing around 4.5 pounds. It features a flaky, golden crust encasing a creamy filling brimming with tender chicken and a medley of vegetables. The pie arrives frozen and requires thorough baking for optimal enjoyment.
The product is designed for convenience, minimizing prep time while delivering a homemade taste. It’s a Kirkland Signature item, known for its quality and value. Initial cooking involves covering the pie with foil to prevent excessive browning, followed by an uncovered phase to achieve a beautifully golden crust. Expect a total baking duration of roughly 90 to 105 minutes at 375°F.
Why Costco Chicken Pot Pie is Popular
Costco’s Chicken Pot Pie enjoys widespread popularity due to its exceptional value, generous portion size, and comforting flavor profile. It offers a convenient alternative to scratch-made pot pies, saving significant time and effort in the kitchen. The large size makes it ideal for family dinners or gatherings, providing ample servings for everyone.
Consumers appreciate the quality of ingredients and the satisfying, creamy texture of the filling. The baking process, while requiring time, is straightforward – cover with foil initially, then uncover for a golden finish. The resulting dish consistently delivers a delicious and heartwarming meal, solidifying its status as a Costco favorite.

Preparing to Cook the Pot Pie
Before baking, ensure the pot pie is fully thawed if frozen. Preheat your oven to 375°F (190°C) and gather a baking sheet and thermometer.
Thawing Instructions (If Frozen)
For optimal results, it’s recommended to thaw the Costco Chicken Pot Pie completely before baking. This ensures even cooking throughout the filling and prevents a soggy crust. The best method is to transfer the frozen pot pie from its packaging to a large dish or tray.
Then, place it in the refrigerator for 24-48 hours, allowing ample time for thorough thawing. If you’re short on time, you can use the cold water method. Submerge the sealed pot pie in cold water, changing the water every 30 minutes, until thawed. Do not use warm or hot water, as this can begin to cook the pie unevenly and compromise its texture. Once thawed, proceed with preheating the oven and baking as directed.
Preheating the Oven
Proper oven preheating is crucial for achieving a perfectly cooked Costco Chicken Pot Pie. Begin by setting your oven to 375°F (190°C). Allow sufficient time for the oven to reach the desired temperature – typically around 15-20 minutes. Using an oven thermometer is highly recommended to ensure accuracy, as oven temperatures can vary.
A consistently heated oven guarantees that the crust will bake to a golden-brown perfection, and the filling will be heated through evenly. Placing the oven rack in the center position is also important for uniform heat distribution. Ensure the oven is fully preheated before placing the pot pie inside for baking, following the detailed cooking instructions.
Necessary Kitchen Tools
Preparing Costco’s Chicken Pot Pie requires only a few essential kitchen tools for a seamless cooking experience. A large baking sheet is vital to contain any potential filling spillage during baking. An oven thermometer ensures accurate temperature control, crucial for even cooking. A meat thermometer is indispensable for verifying the internal temperature reaches a safe 165°F (74°C).
Additionally, you’ll need aluminum foil to cover the pie during the initial baking phase, preventing excessive browning. A sharp knife or pizza cutter will be needed for serving. Finally, oven mitts are essential for safely handling the hot pot pie when removing it from the oven.
Detailed Cooking Instructions
Begin by placing the frozen pot pie on a baking sheet. Cover loosely with foil and bake at 375°F for approximately 50-55 minutes initially.
Initial Baking Phase (With Foil)
To start the cooking process, carefully remove the Chicken Pot Pie from its packaging. Place the frozen pie directly onto a large baking sheet – this will catch any potential spills during baking. It’s crucial to cover the entire pie loosely with aluminum foil. This prevents the crust from browning too quickly while allowing the filling to heat through properly.
Preheat your oven to 375°F (190°C) before placing the pie inside. The initial baking phase, with the foil on, should last for approximately 50 to 55 minutes. This extended, covered baking time ensures the chicken and vegetables within the pie are thoroughly heated and the sauce is bubbling. Remember to check periodically to ensure the foil isn’t sticking to the crust.
Baking Time and Temperature (375°F)
The Costco Chicken Pot Pie requires a consistent baking temperature of 375°F (190°C) for optimal results. The total baking time is generally between 90 to 105 minutes, but this is divided into phases. Initially, bake the pie covered with foil for 50-55 minutes to ensure the filling heats evenly and the chicken reaches a safe temperature.
After the initial covered baking period, remove the foil and continue baking for an additional 5 to 10 minutes. This final phase allows the crust to achieve a beautiful golden-brown color and become delightfully crispy. Monitoring the internal temperature is key, aiming for 165°F (74°C) to guarantee it’s fully cooked;
Removing the Foil
After the initial baking period of 50 to 55 minutes with the aluminum foil covering the pot pie, it’s time to unveil the masterpiece. Carefully remove the foil, being mindful of the escaping steam – oven mitts are highly recommended! This step is crucial for achieving that desirable golden-brown and flaky crust that everyone loves.
Removing the foil allows direct heat to reach the crust, promoting browning and crisping. Continue baking for an additional 5 to 10 minutes, closely monitoring the crust’s color. Ensure the filling is bubbling and the internal temperature reaches 165°F (74°C) for a perfectly cooked and safe-to-eat pot pie.
Final Baking Phase (Without Foil)
Now that the foil has been removed, the final stage of baking begins! This phase focuses on perfecting the crust’s color and ensuring the filling is thoroughly heated. Continue baking for approximately 5 to 10 minutes, keeping a vigilant eye on the pot pie.
The crust should transform into a beautiful golden brown, indicating it’s reached optimal crispness. Simultaneously, the filling will continue to bubble, signaling it’s reached the ideal temperature. A meat thermometer inserted into the center should register 165°F (74°C) to guarantee it’s cooked through. This final bake is key to a truly satisfying Costco chicken pot pie experience!
Checking for Doneness
Ensure the internal temperature reaches 165°F (74°C) with a meat thermometer. Visually, a golden-brown and bubbly crust confirms the Costco pot pie is ready!
Internal Temperature Check (165°F/74°C)
Accurately assessing the internal temperature is crucial for ensuring the Costco Chicken Pot Pie is safely and thoroughly cooked. Insert a reliable meat thermometer into the thickest part of the filling, avoiding the crust. The target temperature is 165°F (74°C). This guarantees that all ingredients, particularly the chicken, have reached a temperature sufficient to eliminate any potential bacteria.
Don’t rely solely on visual cues; a thermometer provides a definitive measure of doneness. If the pie hasn’t reached 165°F, continue baking in 5-10 minute increments, rechecking the temperature each time. Consistent monitoring prevents undercooking and ensures a safe and enjoyable meal for everyone. Remember to clean the thermometer probe thoroughly after use.
Visual Cues of Doneness (Golden Crust)
Alongside the internal temperature, observing the crust’s appearance provides valuable insight into the pot pie’s readiness. A perfectly baked Costco Chicken Pot Pie boasts a beautifully golden-brown crust. This rich color indicates sufficient heat penetration and proper browning of the pastry. Look for an even golden hue across the entire surface, avoiding pale or overly dark spots.
The crust should also appear firm to the touch and slightly puffed up. While visual cues are helpful, always confirm with a thermometer for safety. A golden crust combined with a 165°F internal temperature signifies a perfectly cooked and delicious Costco Chicken Pot Pie, ready to be enjoyed!
Resting and Serving
Allow the cooked pot pie to rest for 15-20 minutes before slicing. This allows the filling to set, preventing a messy serving and ensuring safe handling of the hot dish.
Resting Time (15-20 Minutes)
After the Costco Chicken Pot Pie emerges from the oven, resist the immediate temptation to slice and serve! A crucial, often overlooked step is allowing the pie to rest for a period of 15 to 20 minutes. This resting period isn’t merely about patience; it’s fundamental to achieving the optimal texture and preventing a culinary mishap.
During baking, the filling becomes incredibly hot and fluid. Immediately cutting into the pie will result in a soupy, unstable mess. The resting time allows the internal temperature to equalize, enabling the sauce to thicken and the filling to set properly. This ensures clean slices and a more enjoyable eating experience.
Furthermore, letting the pie rest slightly cools the filling, reducing the risk of burning your mouth. It’s a small wait that yields significant improvements in both presentation and palatability.
Safe Handling of Hot Pot Pie
The Costco Chicken Pot Pie, fresh from the oven, presents a significant heat hazard. Exercise extreme caution when handling and serving this dish to prevent burns. Always utilize oven mitts or pot holders when removing the pie from the oven, as the baking dish will be intensely hot.
When slicing, use a sturdy knife and be mindful of the escaping steam. The filling retains a considerable amount of heat long after baking. Allow guests to portion their own servings, or carefully ladle the filling, avoiding splashes.
Supervise children closely, ensuring they understand the pie is hot and requires careful handling. Provide cooling racks or trivets to protect surfaces from the hot dish. Prioritizing safety ensures everyone can enjoy this comforting meal without incident.
Serving Suggestions
The Costco Chicken Pot Pie is a complete meal in itself, but thoughtful pairings can elevate the dining experience. A simple side salad with a light vinaigrette provides a refreshing contrast to the richness of the pie. Steamed green beans or roasted Brussels sprouts offer a healthy vegetable accompaniment.
For a heartier meal, consider serving with crusty bread for soaking up the flavorful gravy. A crisp white wine, like Chardonnay, or a light-bodied red, such as Pinot Noir, complements the chicken and vegetables beautifully.
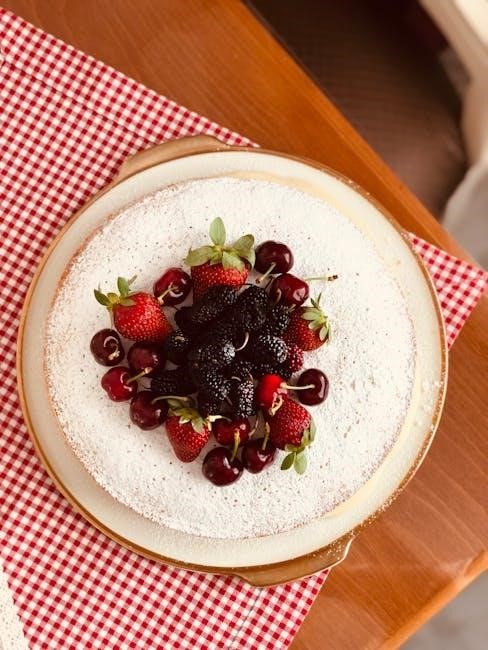
Don’t forget a dollop of cranberry sauce for a touch of sweetness! A warm, comforting dessert like apple crisp or peach cobbler completes the meal perfectly.

Troubleshooting Common Issues
If the crust browns too quickly, tent it loosely with foil. For an underheated filling, extend baking time and ensure the internal temperature reaches 165°F.
Crust Browning Too Quickly
A common issue when baking the Costco Chicken Pot Pie is the crust browning too rapidly before the filling is fully heated. This often happens, especially towards the end of the baking process. To prevent this, it’s recommended to initially cover the entire pot pie loosely with aluminum foil during the majority of the baking time – approximately the first 50-60 minutes.
If you notice the crust is already getting too dark, even with the foil on, gently tent additional foil over the browned areas. This creates a barrier, slowing down the browning process; Remember to remove the foil during the final 5-10 minutes to allow the crust to achieve a golden-brown and crispy finish. Monitoring closely is key!
Filling Not Heated Through
If your Costco Chicken Pot Pie’s crust is golden brown but the filling remains cold or lukewarm, it indicates the heat hasn’t fully penetrated. Don’t be tempted to increase the oven temperature drastically, as this will likely burn the crust. Instead, reduce the oven temperature slightly to 350°F (175°C) and continue baking, covered loosely with foil.
Periodically check the internal temperature of the filling with a meat thermometer, aiming for 165°F (74°C). Ensure the thermometer isn’t touching the crust. Patience is crucial; extending the baking time, while monitoring, will ensure a thoroughly heated and enjoyable pot pie experience.
Nutritional Information (Approximate)
Each serving of Costco’s Chicken Pot Pie contains roughly 630 calories, with key ingredients including chicken, vegetables, and a creamy sauce. Allergens may include wheat and soy.
Calorie Count
Determining the precise calorie count for Costco’s Chicken Pot Pie can vary slightly depending on portion size and individual slicing. However, a reasonable estimate for one-eighth of the entire pie – a typical serving – falls around 630 calories. This substantial caloric value stems from the rich, creamy sauce, the generous filling of chicken and vegetables, and the flaky, buttery crust.
It’s important to note that this is an approximation, and consuming a larger slice will naturally increase the calorie intake. For those mindful of their dietary needs, portion control is key when enjoying this indulgent comfort food. Considering the calorie density, pairing a slice with a light side salad can contribute to a more balanced meal.
Key Ingredients and Allergens
Costco’s Chicken Pot Pie boasts a hearty filling featuring tender chicken, a medley of seasonal vegetables – often including carrots, peas, and potatoes – and a creamy sauce. The crust is a classic flaky pastry, enriched with butter. Key ingredients also include wheat flour, vegetable oils, and various seasonings for flavor enhancement.
However, consumers with allergies should exercise caution. This product contains wheat, making it unsuitable for those with gluten sensitivities. It also includes dairy and soy, common allergens. Potential cross-contamination with other allergens during manufacturing is also possible. Always review the full ingredient list on the packaging before consumption to ensure it aligns with your dietary restrictions.
Costco Chicken Pot Pie Variations & Additions
Enhance your pot pie by adding extra vegetables like mushrooms or broccoli during the last 30 minutes of baking for a personalized touch!
Adding Extra Vegetables
To elevate your Costco Chicken Pot Pie, incorporating additional vegetables is a fantastic idea! Consider sautéing chopped onions and mushrooms in a separate skillet until browned, then adding them to the pot pie during the last 30-40 minutes of baking. This ensures they cook through without becoming mushy.
Other excellent additions include frozen peas, carrots, or broccoli florets. These can be added directly to the pie during the final 30 minutes as well. Remember not to overfill the pie, as this could cause spillage during baking. Adjust baking time slightly if adding a significant amount of vegetables to guarantee everything is heated thoroughly. A vibrant mix of veggies adds both flavor and nutritional value!
Enhancing the Flavor Profile
Beyond simply following the baking instructions, you can significantly enhance the flavor of your Costco Chicken Pot Pie. A sprinkle of fresh herbs like thyme or rosemary over the crust before baking adds an aromatic dimension. For a richer taste, consider brushing the crust with an egg wash before baking to achieve a golden-brown sheen and subtle flavor.
A dash of black pepper or garlic powder mixed into the filling during the last 15 minutes of baking can also elevate the taste. Some cooks even add a splash of white wine or chicken broth for extra depth. Experiment with seasonings to create a pot pie perfectly tailored to your preferences!