Williams Sonoma Bread Maker Manual: A Comprehensive Guide
Discover effortless baking with your Williams Sonoma bread maker! This guide provides detailed instructions, recipes, and troubleshooting tips for optimal performance and delicious results.
Understanding Your Bread Maker
Your Williams Sonoma bread maker is a versatile kitchen appliance designed to simplify the process of homemade bread. It automates kneading, proofing, baking, and even keeping your bread warm. Familiarizing yourself with its capabilities is key to successful baking. This machine isn’t just for white bread; it handles whole wheat, sourdough, and even sweet doughs with ease.
Understanding the machine’s cycle options – from basic to rapid bake – allows for customization. The internal heating element and kneading paddle work in harmony to create consistent results. Remember that different models may have slight variations in features, but the core functionality remains the same. Proper usage and care, as outlined in this manual, will ensure years of delicious, freshly baked bread. Explore the possibilities and enjoy the convenience!
Model Variations and Compatibility
Williams Sonoma offers several bread maker models, each with slightly differing features and capacities. While core functionality remains consistent across the range, variations exist in program options, loaf size, and crust control settings. It’s crucial to identify your specific model number for accurate manual reference and troubleshooting. Many users find that manuals are often similar across different model numbers, sharing core instructions.
Compatibility extends to ingredient usage; most standard bread recipes can be adapted for use in your machine. However, always adhere to recommended ingredient quantities to avoid overflow or improper baking. Ensure your power supply matches the machine’s requirements. This manual aims to cover common features, but always prioritize information specific to your model for optimal performance and safety.
Key Components and Their Functions
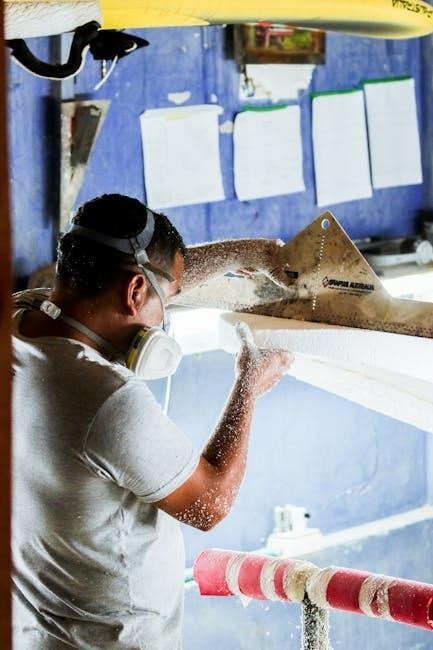
Understanding the components of your Williams Sonoma bread maker is essential for successful operation. The bread pan securely holds ingredients during mixing and baking, requiring thorough cleaning after each use. The kneading paddle mixes and develops gluten, impacting bread texture; ensure it’s properly attached. The heating element provides consistent heat for even baking, while the control panel allows program selection and customization.
The lid seals the machine during operation, preventing heat loss. A viewing window (if equipped) allows monitoring without interrupting the baking cycle. Familiarize yourself with each part’s function to maximize efficiency and prevent damage. Proper component care extends the lifespan of your bread maker and ensures consistently delicious results.

Getting Started: Initial Setup
Prepare for baking success! Carefully unpack your Williams Sonoma bread maker, remove all packaging, and familiarize yourself with its features before first use.
Unboxing and Inspection
Carefully remove your new Williams Sonoma Bread Maker from its packaging; Begin by inspecting the box for any visible signs of damage during shipping. Once opened, verify that all components are present. You should find the bread maker unit itself, the bread pan, the kneading paddle, a measuring cup, and a measuring spoon.
Thoroughly check each item for any defects or missing parts. The bread pan should be free of scratches or dents, and the kneading paddle should be securely attached. Ensure the power cord is intact and undamaged. Retain all original packaging materials, including the instruction manual, for potential warranty claims or future reference. If anything is missing or damaged, immediately contact Williams Sonoma customer support for assistance and do not attempt to operate the machine.

Powering On and Initial Testing
Before your first loaf, it’s crucial to test the bread maker’s functionality. Plug the unit into a grounded electrical outlet. The control panel should illuminate, indicating power. Perform a quick test cycle without any ingredients. Select a basic bread program – often labeled ‘Basic’ or ‘White Bread’ – and ensure the kneading paddle rotates properly within the bread pan.
Observe the machine during this initial run. Listen for any unusual noises or vibrations. Verify the heating element activates. This preliminary test confirms the machine is operating correctly and helps familiarize you with the cycle’s progression. If any issues arise during this test, consult the troubleshooting section of this manual or contact Williams Sonoma support before proceeding with baking.
Control Panel Overview
The Williams Sonoma bread maker features an intuitive control panel. A digital display showcases the selected program, baking time remaining, and any error codes. Program selection buttons allow you to choose from various bread types – white, whole wheat, gluten-free, dough, and more. Crust control settings offer options for light, medium, or dark crusts.
The ‘Start/Stop’ button initiates or halts the baking cycle. A ‘Delay Timer’ function enables pre-programmed baking, allowing fresh bread to be ready when desired. Additional buttons may control functions like warming or quick baking. Familiarize yourself with each button’s function before operation. Refer to the program guide within this manual for specific settings and cycle times for each bread type.

Basic Bread Making: Recipes and Instructions
Embark on your baking journey with simple, delicious recipes! This section details step-by-step instructions for classic loaves, utilizing your Williams Sonoma bread maker effectively.
Classic White Bread Recipe
Yields: 1 standard loaf (approximately 1.5 pounds)
Prep time: 10 minutes
Cook time: 3 hours 30 minutes (including rise time)
Ingredients:
- 3 cups (360g) bread flour
- 1 ¼ cups (300ml) warm water (105-115°F)
- 2 ¼ teaspoons (7g) active dry yeast
- 1 tablespoon (15ml) sugar
- 1 ½ teaspoons (9g) salt
- 2 tablespoons (30ml) unsalted butter, softened
Instructions:
- Add ingredients to the bread maker pan in the order listed (water, yeast, sugar, flour, salt, butter).
- Select the “Basic” or “White Bread” cycle on your Williams Sonoma bread maker.
- Choose your desired loaf size (1.5 lb) and crust color (light, medium, or dark).
- Press start. The machine will handle kneading, rising, and baking.
- Once the cycle is complete, carefully remove the loaf from the pan and let it cool completely on a wire rack before slicing and enjoying!
Whole Wheat Bread Recipe
Yields: 1 standard loaf (approximately 1.5 pounds)
Prep time: 15 minutes
Cook time: 3 hours 45 minutes (including rise time)
Ingredients:
- 2 cups (240g) whole wheat flour
- 1 cup (120g) bread flour
- 1 ¼ cups (300ml) warm water (105-115°F)
- 2 ¼ teaspoons (7g) active dry yeast
- 1 tablespoon (15ml) honey
- 1 ½ teaspoons (9g) salt
- 2 tablespoons (30ml) olive oil
Instructions:
- Combine ingredients in the bread maker pan, following the order: water, yeast, honey, whole wheat flour, bread flour, salt, and oil.
- Select the “Whole Wheat” cycle on your Williams Sonoma machine.
- Choose your preferred loaf size and crust color.
- Press start to begin the automated process.
- After baking, remove the loaf and cool completely before slicing. Enjoy a hearty, wholesome bread!
Sweet Bread and Dessert Recipes
Expand your baking horizons beyond traditional loaves! Your Williams Sonoma bread maker excels at creating delightful sweet breads and even simple desserts. Explore cinnamon raisin bread by adding 1/2 cup raisins and 1 tablespoon cinnamon to a basic white bread recipe. For a chocolate indulgence, incorporate 1/4 cup cocoa powder and 1/2 cup chocolate chips.

Cake-like creations are also achievable. Utilize the “Cake” or “Sweet” program, if available, and adjust liquid ratios accordingly. Consider a simple vanilla cake recipe, reducing the yeast slightly. Remember to monitor baking closely, as sweet doughs often brown faster. Experiment with fruit purees, extracts, and glazes for personalized treats. Always consult the manual for specific program guidelines.

Advanced Features and Techniques
Unlock the full potential of your machine! Explore delay timers, crust controls, and specialized programs like gluten-free and sourdough for expert results.
Delay Timer Functionality
The delay timer feature allows for convenient, freshly baked bread precisely when you desire. This is exceptionally useful for scheduling a loaf to finish in the morning, providing a warm breakfast without early rising. To utilize this function, first select your desired bread program. Then, carefully calculate the total time needed – encompassing kneading, rising, and baking – to achieve your target finish time.
Input the desired delay time using the hour and minute buttons on the control panel. Ensure you account for ingredient stability; avoid adding perishable items like milk or eggs directly if the delay exceeds several hours, as they may spoil. It’s recommended to use the rapid bake cycle for shorter delays. Always double-check your settings before initiating the delay timer to guarantee accurate timing and optimal bread quality. Remember to consider ambient temperature, as it can affect rising times.
Crust Control Settings
Williams Sonoma bread makers offer adjustable crust control, allowing you to customize the bread’s exterior to your preference. Typically, settings range from light to dark, influencing the baking time during the final stages of the cycle. A lighter crust results in a softer exterior, ideal for sandwiches, while a darker crust provides a more robust, flavorful bite, perfect for toast or enjoying on its own.

To adjust the crust color, use the designated “Crust Color” or similar button on the control panel. Each press usually cycles through the available options. Experimenting with different settings is encouraged to discover your ideal crust shade. Note that higher altitudes or varying ingredient hydration levels may slightly affect the final crust color. Consistent results are achieved by using the same settings and ingredients each time.
Specialty Bread Programs (Gluten-Free, Sourdough)
Williams Sonoma bread makers often include pre-programmed settings for specialty breads like gluten-free and sourdough. The gluten-free program utilizes a specific kneading and rising cycle optimized for gluten-free flour blends, which lack the elasticity of traditional wheat flour. This ensures proper structure and texture. The sourdough program typically involves a longer rise time to allow for natural fermentation and flavor development.
When using the sourdough setting, ensure your starter is active and properly prepared. Refer to the recipe for specific starter quantities and hydration levels. For gluten-free baking, always use a certified gluten-free flour blend and consider adding a binder like xanthan gum for improved texture. Always consult the manual for specific program durations and recommended ingredient ratios for best results with these specialty breads.

Troubleshooting Common Issues
Resolve baking problems quickly! This section addresses issues like rising failures, burning, or error codes, ensuring consistently perfect loaves from your Williams Sonoma machine.
Bread Not Rising Properly
Insufficient yeast is a primary culprit; ensure it’s fresh and measured accurately. Expired yeast loses potency, hindering rise. Incorrect liquid temperature impacts yeast activation – too hot kills it, too cold slows it. Verify the liquid isn’t exceeding 115°F (46°C).
Also, check the flour type; whole wheat requires more liquid and may result in a denser loaf. Overmixing can develop too much gluten, inhibiting rise, while undermixing won’t create sufficient structure. Ensure ingredients are added in the correct order, as specified in your recipe.
Ambient temperature matters; cold environments slow yeast activity. A warm kitchen aids rising. Finally, confirm the bread maker’s lid seals properly during operation, maintaining consistent warmth and humidity for optimal results. Consider a second proofing if needed.
Burning or Uneven Baking
Uneven heating within the bread maker can cause burning or inconsistent baking. Ensure the bread pan is correctly seated and the paddle is securely attached. Excessive sugar or fat content in the recipe can accelerate browning, leading to burning. Reduce these ingredients slightly if this occurs frequently.
Check the heating element for any obstructions or buildup. A malfunctioning heating element may cause localized hot spots. The crust control setting might be too high; experiment with lighter settings. Overloading the bread maker with too much dough can also result in uneven baking.
Consistent power supply is crucial; voltage fluctuations can affect baking temperature. Finally, ensure the bread maker is placed on a level surface for even heat distribution throughout the baking cycle.
Error Codes and Their Meanings
Decoding error messages is vital for troubleshooting your Williams Sonoma bread maker. “Err 1” typically indicates a power interruption during the baking cycle; restart the machine. “Err 2” suggests a temperature sensor malfunction – contact customer support. “Err 3” often means the lid wasn’t properly closed during operation, preventing the cycle from continuing.
“Err 4” can signify an overloaded bread pan, exceeding the machine’s capacity. Reduce the ingredient quantity and retry. If “Err 5” appears, it usually points to a stuck paddle; carefully remove it after the cycle cools. A flashing error code may require a reset by unplugging the machine for several minutes.
Consult the full manual for a comprehensive list, as codes can vary by model. Always prioritize safety and disconnect the power before attempting any repairs.

Maintenance and Cleaning
Regular cleaning ensures longevity and optimal performance. Always unplug the machine before cleaning, and allow all parts to cool completely first.
Cleaning the Bread Pan and Paddle
After each use, promptly remove the bread pan and kneading paddle from the bread maker. Allow them to cool completely before washing. Both the pan and paddle are typically non-stick coated; therefore, avoid using abrasive cleaners, scouring pads, or metal utensils, as these can damage the coating.
Wash the bread pan and paddle with warm, soapy water. A soft sponge or cloth is ideal. Ensure all traces of dough and residue are removed. For stubborn baked-on dough, soak the pan in warm, soapy water for 15-20 minutes before washing. Rinse thoroughly with clean water and dry completely with a soft towel before reinserting them into the bread maker.
Some models may have a bread pan and paddle that are dishwasher safe; however, hand washing is generally recommended to prolong their lifespan and maintain the non-stick coating’s integrity.
Exterior Cleaning and Care
To maintain the appearance and functionality of your Williams Sonoma bread maker, regular exterior cleaning is essential. Always unplug the appliance and allow it to cool completely before cleaning. Wipe down the exterior surfaces with a soft, damp cloth. Avoid using abrasive cleaners, solvents, or harsh chemicals, as these can damage the finish.
For stubborn stains or spills, a mild dish soap solution can be used. Apply the solution to a cloth, not directly onto the appliance, and gently wipe the affected area. Rinse with a clean, damp cloth and dry thoroughly. Do not immerse the bread maker in water or any other liquid.
Periodically, inspect the power cord for any signs of damage. If the cord is damaged, discontinue use and contact Williams Sonoma customer support for assistance. Proper exterior care will ensure your bread maker remains in excellent condition for years to come;
Long-Term Storage Instructions
When storing your Williams Sonoma bread maker for an extended period, proper preparation is crucial. Ensure the appliance is completely clean and dry, both inside and out, following the cleaning instructions in this manual. Remove the bread pan and kneading paddle, washing them thoroughly and storing them separately in a dry location.
Before storing, wrap the exterior of the bread maker in a dust cover or place it inside a large plastic bag to protect it from dust and moisture. Store the appliance in a cool, dry place, away from direct sunlight and extreme temperatures. Avoid storing it in damp basements or hot attics.
Periodically check the stored bread maker to ensure it remains dry and free from pests. Proper long-term storage will help preserve the appliance’s functionality and extend its lifespan.

Resources and Support
For assistance, explore Williams Sonoma’s website for parts, FAQs, and contact information. Online forums also offer community support and helpful advice.
Finding Replacement Parts
Locating replacement parts for your Williams Sonoma bread maker is crucial for maintaining its functionality and extending its lifespan. Williams Sonoma’s official website is the primary source for genuine parts, offering a dedicated section for bread maker components. This includes items like bread pans, kneading paddles, heating elements, and various small parts.
When searching, having your bread maker’s model number readily available is essential to ensure compatibility. You can typically find this information on a sticker located on the bottom or back of the appliance. If you’re unable to find the part you need on the Williams Sonoma website, consider contacting their customer support directly. They can assist with part identification and availability.
Alternatively, some third-party appliance parts retailers may carry compatible components, but verifying the quality and suitability is vital before purchasing. Always prioritize genuine Williams Sonoma parts whenever possible to guarantee optimal performance and avoid potential issues.
Williams Sonoma Customer Support Contact Information
For dedicated assistance with your Williams Sonoma bread maker, several convenient contact options are available. You can reach their customer service team via phone at 1-888-922-4108, available Monday through Friday, 5 am to 9 pm PT, and Saturday/Sunday, 6 am to 7 pm PT. Alternatively, explore their comprehensive online help center at williams-sonoma.com/help, offering FAQs, troubleshooting guides, and detailed product information.
Live chat support is also readily accessible on their website for immediate assistance with specific questions or concerns. Email support is available through the contact form on their website, ensuring a documented record of your inquiry. When contacting support, be prepared to provide your bread maker’s model number and a detailed description of the issue you’re experiencing.
Williams Sonoma prides itself on excellent customer service, aiming to resolve issues efficiently and effectively.
Online Forums and Communities
Beyond official support, a wealth of knowledge exists within online forums and communities dedicated to bread making and specifically, Williams Sonoma appliances. Websites like Reddit host active subreddits – search for “breadmaking” or related terms – where users share recipes, troubleshooting tips, and experiences with various bread maker models. Dedicated appliance forums often feature sections for Williams Sonoma products, fostering a collaborative environment.
Facebook groups centered around bread baking are also valuable resources, providing a platform for asking questions, sharing photos of your creations, and learning from fellow enthusiasts. These communities often include experienced Williams Sonoma bread maker owners willing to offer guidance.
Remember to always verify information found in online forums with official documentation or Williams Sonoma support.