MVP Garage Door Opener Manual: A Comprehensive Guide
Welcome! This manual provides detailed instructions for installing, operating, and maintaining your MVP garage door opener, ensuring years of reliable service and enhanced convenience.
Modern openers boast improved safety, quieter operation, and smart features like MyQ integration, offering seamless control and monitoring of your garage access.
Understanding the various drive types – chain, belt, or screw – and associated costs is crucial for making informed decisions about your garage door system.
Understanding MVP Garage Door Openers
MVP garage door openers represent a commitment to reliable access and modern convenience for your home. These systems have evolved significantly, incorporating advancements in safety, noise reduction, and smart home integration. Understanding the core components and features is key to maximizing your opener’s performance and lifespan.
Historically, garage door openers were primarily focused on basic functionality. However, contemporary models, like those utilizing the MyQ platform from LiftMaster and Chamberlain, now offer remote control via smartphones and integration with other smart home devices; This allows for monitoring and operation from virtually anywhere.
The average cost to replace a garage door opener ranges around $375, but this can fluctuate based on the chosen features and drive type. Selecting the right opener involves considering factors like garage size, door weight, and desired level of automation. Proper installation and regular maintenance are vital for ensuring optimal operation and preventing costly repairs.
What is an MVP Garage Door Opener?
An MVP garage door opener is a motorized system designed to conveniently and safely raise and lower your garage door. Modern units move beyond simple operation, offering features like enhanced safety mechanisms and quieter performance compared to older models. They eliminate the need to manually lift heavy doors, especially beneficial during inclement weather.
These openers come in various drive types – chain, belt, screw, and direct-drive – each with unique characteristics regarding noise level and cost. Integration with platforms like MyQ allows for smartphone control and monitoring, adding a layer of security and accessibility.
Replacing a garage door opener typically costs around $375, but the price varies depending on the model and features. A well-maintained opener provides years of reliable service, enhancing your home’s security and convenience. Regular checks and lubrication are essential for optimal performance.
Key Features of MVP Garage Door Openers
MVP garage door openers boast several key features designed for convenience, safety, and modern living. Smart Home Integration, particularly MyQ compatibility, allows remote control and monitoring via smartphone, enhancing security and accessibility. Advanced models include battery backup systems, ensuring operation even during power outages.
Safety sensors are a crucial feature, preventing the door from closing on obstructions. Different drive types – chain, belt, and screw – offer varying levels of noise and durability. Quiet operation is a significant improvement in newer models.
Wall controls and remote controls provide easy operation. Adjustable travel limits allow customization for different door heights. These features combine to create a reliable and user-friendly garage door experience, adding value and peace of mind to your home.
Installation & Setup
Proper installation is vital for safe and reliable operation. This section details unboxing, mounting, sensor connection, and arm attachment, ensuring a secure setup process.
Unboxing and Component Check
Carefully unpack the MVP garage door opener box, ensuring you have ample space to avoid damaging any components. Begin by verifying the contents against the included parts list – typically, this includes the opener unit itself, a garage door arm, safety sensors, a wall control panel, remote controls, mounting hardware (brackets, bolts, nuts), and this comprehensive manual.
Inspect each item for any signs of shipping damage, such as dents, cracks, or missing parts. If you discover any issues, immediately contact customer support for assistance and do not proceed with the installation. Lay out all components in an organized manner to facilitate a smooth installation process. Familiarize yourself with each part’s function before moving on to the mounting stage. A thorough component check prevents delays and ensures a successful setup.
Mounting the Opener Unit
Prior to mounting, carefully assess the structural integrity of your garage ceiling joists. The opener unit is heavy and requires secure attachment to withstand vibrations during operation. Utilize the provided mounting brackets to position the opener unit centrally, allowing adequate clearance for the garage door’s travel path.
Securely fasten the brackets to the joists using appropriate lag screws and washers – ensure they are firmly anchored. Carefully lift the opener unit onto the mounted brackets, aligning the slots and securing it with the provided hardware. Double-check that the unit is level and stable before proceeding. Proper mounting is critical for safe and reliable operation, preventing potential damage or injury. Verify all connections are tight and secure.
Connecting the Safety Sensors
Safety is paramount! The safety sensors are crucial for preventing the garage door from closing on obstructions. Locate the sensor brackets along the sides of the garage door track, ensuring they are positioned no more than six inches above the floor.
Connect the sensor wires to the opener unit, matching the terminals correctly – typically labeled as “sensor” or similar. Align the sensors so the beams are directed at each other, and test the system by placing an object in the path of the beam. The door should reverse immediately. If it doesn’t, re-align the sensors or check the wiring connections. Regularly test these sensors to ensure continued functionality and prevent accidents.
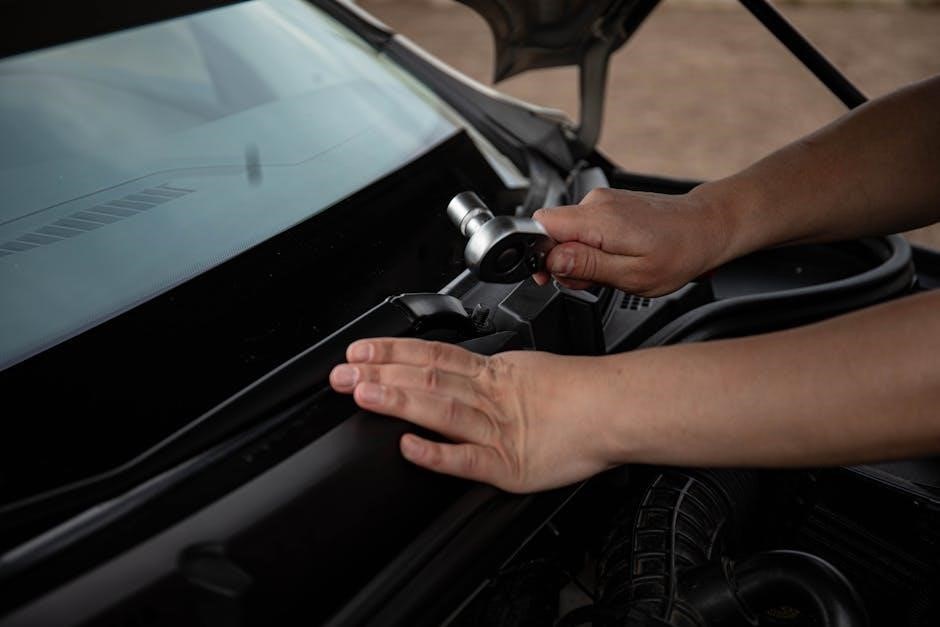
Attaching the Garage Door Arm
Securely connecting the garage door arm is vital for smooth and reliable operation. Position the opener unit directly above the center of the garage door. Attach the curved garage door arm to both the opener’s carriage and the top section of the garage door using the provided bolts and nuts.
Ensure proper alignment; the arm should be angled correctly to lift the door smoothly without binding. Tighten all connections firmly, but avoid over-tightening, which could damage the components. After attachment, manually test the door’s movement to confirm it operates freely. Adjust the arm’s position if necessary to achieve optimal performance and prevent strain on the opener mechanism. This step is critical for long-term durability.

Operation & Programming
Effortless control is now yours! Learn to utilize the wall control, program remote controls, and explore smart home integration with MyQ for ultimate convenience.
Precisely set travel limits to customize the door’s opening and closing range, ensuring optimal functionality and safety for your garage access system.
Using the Wall Control
The wall control is your primary method for operating the MVP garage door opener. Located conveniently inside your garage, it provides a reliable and accessible way to manage your door’s functions.
To operate, simply press the corresponding button – one to close the door, and another to open it. A single press initiates the door’s movement, and the opener will automatically stop at the pre-set travel limits. Observe the indicator lights; a steady light usually indicates normal operation, while flashing lights may signal an issue requiring attention.
The wall control also often features a “stop” button, allowing you to immediately halt the door’s movement mid-cycle. This is particularly useful in emergency situations or if an obstruction is detected. Remember to always visually confirm the door’s path is clear before operating, and never rely solely on the safety sensors.
For safety, familiarize yourself with the lock-out feature, if equipped, which prevents accidental activation of the opener. Regular testing of the wall control ensures its continued functionality and provides peace of mind.
Remote Control Programming
Programming your MVP garage door opener’s remote control is a straightforward process, granting you convenient access from your vehicle or elsewhere on your property. Begin by locating the “learn” button on the opener unit itself – it’s typically yellow or orange. Press and release this button to activate learning mode.
Within 30 seconds, press and hold the desired button on your remote control; The garage door should briefly move, confirming successful programming. Repeat this process for each additional remote you wish to pair with the system. If programming fails, ensure the remote has fresh batteries and repeat the steps, keeping the remote close to the opener unit.
Some models may require clearing existing remotes before adding new ones. Consult the full manual for specific instructions. Remember to test each remote after programming to verify functionality. Enjoy the convenience of remote access!

Smart Home Integration (MyQ Compatibility)
Your MVP garage door opener is likely compatible with MyQ technology, unlocking a world of smart home convenience. MyQ allows you to control, monitor, and receive notifications about your garage door from anywhere using your smartphone. To begin, download the MyQ app from your app store and create an account.
Follow the in-app instructions to connect your opener to your home’s Wi-Fi network. The app will guide you through the pairing process, which typically involves pressing a “learn” button on the opener unit. Once connected, you can open or close the door remotely, set schedules, and grant access to guests.
MyQ also offers integration with other smart home platforms, such as Amazon Alexa and Google Assistant, enabling voice control. Be aware of potential subscription fees for advanced features.
Setting Travel Limits
Accurate travel limit settings are crucial for safe and efficient garage door operation. These limits define how far the door opens and closes, preventing it from hitting obstructions or reversing unexpectedly. Your MVP opener features adjustable up and down travel limits.
To adjust these, locate the limit adjustment screws on the opener unit – consult your specific model’s diagram. Use a screwdriver to make small adjustments, testing the door’s movement after each change. Begin by setting the ‘down’ limit to ensure the door fully closes, but doesn’t apply excessive pressure to the floor.
Next, set the ‘up’ limit, ensuring the door opens to the desired height without straining the opener. Precise adjustments prevent unnecessary wear and tear, and maintain optimal safety sensor functionality.
Troubleshooting Common Issues
Facing problems? This section offers solutions for typical issues like unresponsive openers, unexpected reversals, safety sensor failures, and remote control malfunctions, ensuring quick fixes.
Addressing these promptly maintains safety and extends the lifespan of your MVP garage door opener system, providing continued convenience.
Regular checks and adjustments can prevent many issues, saving you time and potential repair costs in the long run.
Opener Not Responding
Is your MVP garage door opener failing to respond to commands? Several factors could be at play. First, check the power supply. Ensure the opener is properly plugged into a functioning outlet and that the circuit breaker hasn’t tripped. A simple power interruption is often the culprit.
Next, examine the wall control. Verify the batteries are fresh and that the wiring connections are secure. Try using the wall control from a different location to rule out a wiring issue. If the wall control is faulty, it will need replacement.
Remote controls should also be tested with new batteries. If multiple remotes aren’t working, the receiver in the opener unit might be the problem. Finally, confirm the safety sensors are aligned and free of obstructions. A misaligned sensor will prevent the opener from functioning as a safety precaution.
If none of these steps resolve the issue, consult a qualified technician for further diagnosis and repair.
Door Reverses Unexpectedly
Is your MVP garage door reversing direction mid-close? This is often a safety feature activation, indicating an obstruction or sensitivity issue. The most common cause is misaligned or obstructed safety sensors. Carefully inspect the sensors at the base of the door tracks, ensuring they are clean, facing each other, and free from debris.
Adjust the sensitivity settings on your opener unit. A higher sensitivity can cause the door to reverse with minimal resistance. Lowering the sensitivity might resolve the issue, but avoid setting it too low, compromising safety.
Check the door’s balance. A poorly balanced door requires excessive force to operate, triggering the safety mechanism. If the door feels heavy or struggles to move smoothly, professional adjustment or repair is necessary. Inspect the travel limits; incorrect settings can also cause unexpected reversals.
If the problem persists, consult a qualified technician to diagnose and address any underlying mechanical issues.
Safety Sensor Problems
Experiencing issues with your MVP garage door’s safety sensors? These sensors are crucial for preventing injuries and ensuring safe operation. A common symptom is the door not closing, or repeatedly reversing. First, visually inspect the sensors located near the floor on both sides of the garage door opening.
Ensure they are aligned, facing each other, and free from obstructions like cobwebs, dirt, or seasonal debris. Clean the sensor lenses with a soft cloth. Check the wiring connections to the opener unit; loose or damaged wires can disrupt the signal.
Look for a blinking LED on the sensors – a solid light usually indicates proper function. If a sensor is blinking, it signifies a problem. Adjust the sensor brackets to fine-tune alignment. If issues persist, consult the opener’s manual for specific troubleshooting steps or contact a qualified technician.
Never bypass or disable the safety sensors, as this compromises safety.
Remote Control Malfunctions
Is your MVP garage door remote control failing to operate? Several factors can cause this issue. Begin by checking the battery – a weak battery is the most common culprit. Replace it with a fresh one, ensuring correct polarity. Verify the remote is programmed to the opener unit; refer to the “Remote Control Programming” section of this manual for instructions.
Ensure there’s no interference from other radio frequencies. Try operating the remote closer to the opener unit. Check for physical damage to the remote itself, such as cracked casing or stuck buttons. If you have multiple remotes, test them all to determine if the problem is isolated to one unit.
Consider reprogramming the remote even after a battery change, as the code may have become corrupted. If problems persist, consult the manual or contact customer support for assistance. Chamberlain and LiftMaster, utilizing MyQ, offer robust remote functionality.

Maintenance & Safety
Prioritize safety and longevity! Regularly lubricate moving parts, inspect chain/belt tension, and test safety sensors for optimal performance and reliable operation.
Familiarize yourself with the emergency release procedure for manual operation, ensuring preparedness in power outages or system failures.
Regular Lubrication
Maintaining optimal lubrication is paramount for the smooth and quiet operation of your MVP garage door opener. Over time, moving parts experience friction, leading to wear and tear, increased noise, and potential malfunctions. Regular lubrication minimizes these issues, extending the lifespan of your opener and ensuring consistent performance.
Apply a lithium-based grease to the chain or belt (depending on your model) every six months. Avoid using oil-based lubricants, as they can attract dust and grime, creating a sticky residue. Focus on the following areas: the chain or belt itself, the sprocket, and any bearings or rollers.
The opener’s rail should also be lightly lubricated. Additionally, the door hinges and rollers benefit from silicone-based spray lubricant. Always disconnect the power to the opener before performing any maintenance! Wipe away any excess lubricant to prevent dirt accumulation. Consistent lubrication is a simple yet effective preventative measure that saves you from costly repairs down the line.
Checking Chain/Belt Tension
Proper chain or belt tension is critical for efficient and reliable operation of your MVP garage door opener. Incorrect tension can lead to slipping, noise, and premature wear of the drive system. Regularly inspecting and adjusting the tension ensures optimal performance and prevents potential damage.
For chain-driven openers, the chain should have minimal slack – approximately ½ to ¾ inch of deflection when pressed midway between the sprockets. If the chain is too loose, it may slip or jump teeth. If it’s too tight, it puts excessive strain on the motor and bearings.
Belt-driven openers require a slightly different approach. The belt should feel taut but not overly stressed. Check for signs of wear or cracking. Always disconnect the power before adjusting tension! Refer to your opener’s specific adjustment mechanism for precise instructions. Maintaining correct tension extends the life of your opener and ensures smooth, quiet operation.
Safety Sensor Testing
Regularly testing your MVP garage door opener’s safety sensors is paramount for preventing accidents and ensuring the safety of your family and pets. These sensors utilize an infrared beam to detect obstructions in the door’s path, automatically reversing the door’s operation if the beam is broken.
To test, place a tall object (like a 2×4 piece of wood) directly in the door’s path. Activate the door using the wall control or remote. The door should immediately stop and reverse direction upon encountering the obstruction. Repeat this test in multiple locations across the door’s width.
If the door fails to reverse, check the sensor alignment, wiring connections, and lens cleanliness. Ensure nothing is blocking the sensors’ view. Never disable or bypass the safety sensors! Proper functionality is crucial for a safe operating system.
Emergency Release Procedure
Knowing the emergency release procedure for your MVP garage door opener is vital in situations where the opener malfunctions, or you need manual access to your garage. This allows you to disengage the door from the opener, enabling manual operation.
Locate the emergency release cord, typically hanging from the trolley. Pull the cord firmly and steadily towards the rear of the garage. This will disengage the door from the opener carriage. Be cautious, as the door may be under spring tension and could move quickly.
Once disengaged, you can manually lift or lower the door. To re-engage, simply pull the cord again until it clicks back into place. Test the opener’s operation after re-engagement. Never attempt to force the release mechanism.

Advanced Features & Options
Explore enhancements! Battery backups provide power during outages, monitoring systems offer security, and diverse drive types cater to specific needs and budgets.
Battery Backup Systems
Power Through Outages: MVP garage door openers offer optional battery backup systems, providing continued operation even during power failures. This is a crucial feature for homeowners in areas prone to storms or unreliable electricity. These systems typically engage automatically within seconds of a power loss, allowing you to open or close the garage door as needed.
System Components & Functionality: A typical battery backup includes a dedicated battery pack, a charging circuit, and an automatic transfer switch. The battery is constantly charged when the opener is connected to a power source. Installation requires careful attention to wiring and safety guidelines, and it’s often recommended to consult a qualified technician.
Limitations & Considerations: While incredibly useful, battery backups have limitations. The number of cycles (open/close operations) on a single charge is finite, and the system is designed for emergency use, not sustained operation; Regularly testing the battery backup system is vital to ensure it functions correctly when needed.
Monitoring System Integration
Enhanced Security & Control: MVP garage door openers seamlessly integrate with popular home security and monitoring systems, offering an extra layer of protection and convenience. This integration allows you to remotely monitor the status of your garage door – open or closed – through a smartphone app or web portal.

MyQ Compatibility & Beyond: Many MVP models are compatible with the MyQ platform, enabling control via the MyQ app and integration with other smart home devices. Beyond MyQ, compatibility with broader security ecosystems like Ring, SimpliSafe, and others is expanding, providing greater flexibility.
Alerts & Notifications: Integration allows for real-time alerts if the garage door is left open for an extended period or is unexpectedly activated. This feature provides peace of mind and helps prevent potential security breaches. Proper setup and configuration within your chosen monitoring system are essential for optimal performance.
Different Drive Types (Chain, Belt, Screw)
Understanding Your Options: MVP garage door openers utilize three primary drive systems: chain, belt, and screw. Each offers distinct advantages regarding noise level, maintenance, and cost. Chain drives are the most traditional and typically the most affordable, but also the loudest.
Belt Drives – Quiet Operation: Belt drives utilize a rubber or polyurethane belt instead of a chain, resulting in significantly quieter operation. They are a popular choice for garages attached to living areas. However, belt drives generally cost more than chain drives.
Screw Drives – Durability & Reliability: Screw drives employ a threaded steel screw that lifts and lowers the door. They require minimal maintenance and offer a good balance of cost and performance. While not as quiet as belt drives, they are quieter than chain drives and known for their durability.
Understanding Garage Door Opener Costs
Budgeting for Your Opener: The cost of an MVP garage door opener varies significantly based on the drive type, features, and installation complexity. On average, replacement costs range from $375, but this is a broad estimate.
Factors Influencing Price: Chain-driven openers are generally the least expensive, while belt-drive and screw-drive models command higher prices. Smart features, like MyQ compatibility for remote access and monitoring, also increase the overall cost.
Installation Expenses: Professional installation typically adds $150 to $300 to the total expense. DIY installation can save money, but requires technical skill and adherence to safety guidelines. Consider potential costs for additional components like battery backups or safety sensors.