Kenmore Sewing Machine 385 Manual: A Comprehensive Guide
Discover detailed instructions, troubleshooting, and parts diagrams for Kenmore 385 models (1764180, 1778180, and others) within this extensive manual resource․
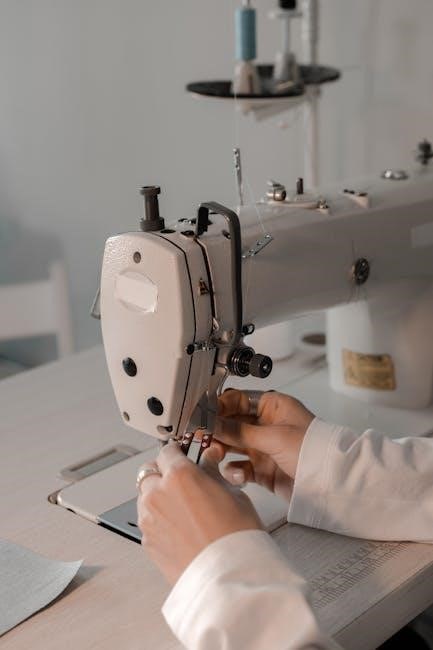
The Kenmore 385 sewing machine represents a reliable and versatile option for both beginner and experienced sewers․ This manual serves as a comprehensive resource, offering detailed guidance on operation, maintenance, and troubleshooting for various 385 models, including 1764180 and 1778180․
Understanding your machine is key to unlocking its full potential․ This guide will walk you through each component, from spool winding to stitch selection, ensuring smooth and efficient sewing․ We’ll cover essential setup procedures, like threading and needle installation, alongside practical techniques for straight and zigzag stitching․
Furthermore, this resource addresses common issues like thread breakage and skipped stitches, providing clear solutions․ Accessing the correct manual, as detailed later, is crucial for model-specific instructions․
Understanding the Kenmore 385 Models (1764180, 1778180, etc․)
Kenmore 385 sewing machines were produced with several variations, identified by unique model numbers like 1764180, 1778180, 16120200, and 19110․ While sharing a core design, subtle differences exist in features and functionalities across these models․ Therefore, locating the specific manual for your machine is paramount for accurate instructions․
These machines generally offer a range of stitch options and adjustable settings, catering to diverse sewing projects․ The availability of parts and service information can also vary depending on the model number․ Online resources often list manuals for these specific variations, offering detailed diagrams and operational guidance․
Confirming your exact model number, usually found on a plate on the machine, ensures you’re referencing the correct documentation for optimal performance and repair․
Locating the Correct Manual for Your Specific 385 Model
Finding the right manual for your Kenmore 385 is crucial․ Numerous online resources host PDF versions of these manuals, categorized by model number (e․g․, 1764180, 1778180)․ Websites specializing in appliance manuals, like those archiving Sears documents, are excellent starting points․
Search using your machine’s complete model number for the most accurate results․ Be cautious of generic manuals, as variations exist between 385 models․ Several sites offer manuals ranging from 35 to 85 pages, detailing everything from threading to troubleshooting․
If online searches prove unsuccessful, consider contacting Sears Parts Direct or exploring sewing machine enthusiast forums for assistance in locating the correct documentation․
Key Features and Components
Explore the Kenmore 385’s essential parts: spool winding, needle/presser foot mechanisms, and stitch selection dial – all detailed within this comprehensive guide․
Identifying the Major Parts of the Kenmore 385
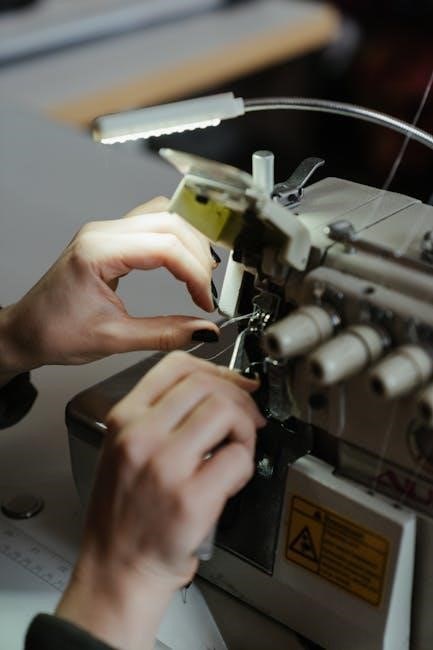
Understanding the Kenmore 385 begins with recognizing its core components․ The machine features a robust needle and presser foot system, crucial for fabric manipulation․ The spool winding mechanism ensures consistent thread supply, vital for smooth operation․ A prominent stitch selection dial allows users to choose from various stitch patterns, expanding creative possibilities․
Key areas include the bobbin case, responsible for creating the lower stitch, and the feed dogs, which advance the fabric․ The tension discs control thread tightness, impacting stitch quality․ Familiarize yourself with the power switch, reverse lever, and handwheel for complete control․ Detailed diagrams, often found in the full manual, illustrate each part’s location and function, aiding in maintenance and repair․ Knowing these parts is fundamental for effective use;
Spool Winding System Explained
The Kenmore 385’s spool winding system efficiently prepares thread for sewing․ Begin by placing the thread spool on the spool pin․ Guide the thread through the tension disc, ensuring consistent pressure․ Next, thread the end through the bobbin winder guide and onto the bobbin․ Secure the bobbin onto the bobbin winder spindle․
Engage the bobbin winder by pushing the bobbin winder lever․ Depress the foot pedal to start winding; the machine will automatically stop when full․ Proper tension is crucial – adjust the tension disc if the winding is uneven․ Regularly check the bobbin for consistent, even layers․ A correctly wound bobbin ensures smooth, reliable stitching and prevents thread nests during sewing operations․
Needle and Presser Foot Mechanisms
The Kenmore 385 utilizes a vertical oscillating needle system, powered by a robust motor․ Correct needle installation is vital; ensure the flat side faces backward․ The needle’s movement is synchronized with the presser foot, which maintains fabric contact․ Different presser feet cater to various tasks – a standard foot for general sewing, a zigzag foot for decorative stitches, and specialized feet for zippers or buttonholes․
Adjusting presser foot pressure is key for optimal fabric feed․ Lighter fabrics require lower pressure, while heavier materials need more․ Proper alignment between the needle and presser foot prevents skipped stitches and fabric bunching․ Regularly inspect the needle for damage and replace it as needed to maintain sewing quality and prevent breakage․
Stitch Selection Dial and Functions
The Kenmore 385’s stitch selection dial offers a range of options, including straight stitch, zigzag stitch, and potentially decorative stitches depending on the specific model․ The dial allows users to easily choose the desired stitch pattern for their project․ Understanding each stitch’s function is crucial for achieving professional results․
Straight stitches are ideal for constructing seams, while zigzag stitches provide elasticity and are suitable for finishing raw edges․ Experiment with different stitch widths and lengths to achieve varied effects․ Refer to the manual for detailed explanations of each stitch and its recommended applications․ Proper stitch selection enhances both the durability and aesthetic appeal of your sewing projects․
Setting Up Your Kenmore 385
Prepare for successful sewing by correctly threading the machine, winding the bobbin, installing the needle, and adjusting thread tension for optimal performance․
Threading the Machine (Upper and Bobbin)
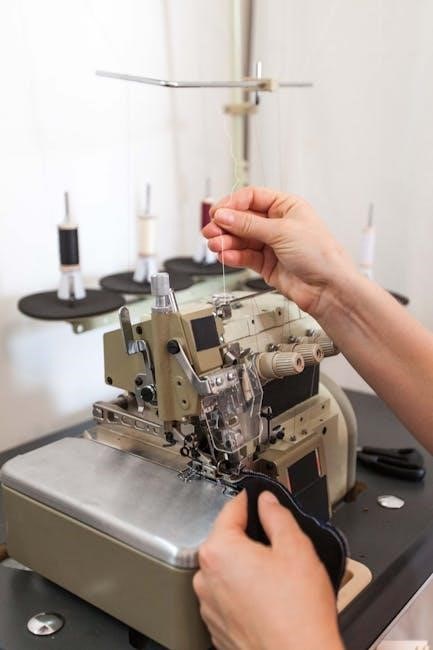
Proper threading is crucial for smooth operation․ Begin by raising the presser foot and the needle to its highest position․ Guide the upper thread from the spool, through the tension discs – ensuring it seats firmly – and down through the take-up lever․ Next, thread the needle from front to back․
For the bobbin, securely place the bobbin on the bobbin winder spindle․ Engage the bobbin winding mechanism and start the machine․ Once full, disengage and remove the bobbin․ Insert the bobbin into the bobbin case, ensuring it rotates freely and the thread feeds correctly․ Finally, draw up the bobbin thread through the needle plate opening using the handwheel․
Bobbin Winding Instructions
To wind the bobbin, place the thread spool on the spool pin․ Guide the thread through the thread guide and onto the bobbin․ Secure the bobbin onto the bobbin winder spindle, ensuring it clicks into place․ Push the bobbin winder to the right to engage it․
Depress the foot pedal to begin winding․ The machine will automatically stop when the bobbin is full․ Disengage the bobbin winder by pushing it back to the left․ Remove the full bobbin and trim the thread․ Proper winding ensures even stitches; avoid overfilling the bobbin for optimal performance and prevent thread jams during sewing operations․
Installing the Needle Correctly
Ensure the machine is off before changing the needle․ Loosen the needle clamp screw using the screwdriver․ Insert the new needle with the flat side facing the back of the machine․ Push it up as far as it will go․
Tighten the needle clamp screw securely, but do not overtighten․ A correctly installed needle is crucial for proper stitch formation and preventing damage․ Always use the correct needle type for your fabric․ Incorrect installation can lead to skipped stitches, needle breakage, or machine malfunction․ Regularly check the needle for bends or damage․
Adjusting Thread Tension
Proper thread tension is vital for balanced stitches․ Begin with the tension dial set to the default position (usually marked ‘4’ or a similar mid-range value)․ Test sew on a scrap of your fabric․ If the bobbin thread pulls to the top, loosen the upper tension․ Conversely, if the upper thread pulls to the bottom, tighten the upper tension․
Make small adjustments – a quarter turn at a time – and retest after each change․ Consistent tension ensures even stitch formation and prevents puckering or looping․ Different fabrics and thread weights require varying tension settings․ Refer to the manual’s tension guide for specific recommendations․
Basic Sewing Operations
Master fundamental techniques like straight and zigzag stitching, adjusting stitch length/width, and utilizing various presser feet for diverse sewing projects․
Straight Stitching Techniques
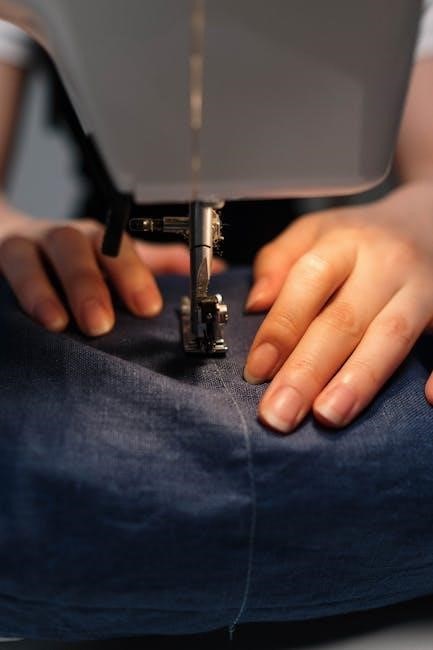
Achieving a perfect straight stitch with your Kenmore 385 requires careful attention to detail․ Begin by ensuring the machine is correctly threaded, both the upper thread and the bobbin․ Select the straight stitch setting on the stitch selection dial․ Practice on scrap fabric first to establish consistent stitch length – typically around 2․5mm is a good starting point․
Maintain a consistent sewing speed and gently guide the fabric, avoiding pushing or pulling․ Keep the edge of the fabric aligned with the desired seam allowance guide on the needle plate․ Regularly check the stitch formation; uneven stitches may indicate tension issues or incorrect needle insertion․ For longer seams, use a comfortable posture and maintain a steady rhythm for optimal results․ Remember to backstitch at the beginning and end of each seam to secure the stitches․
Zigzag Stitching Applications
The Kenmore 385’s zigzag stitch offers versatility beyond basic seams․ Utilize it for finishing raw edges to prevent fraying, creating decorative embellishments, or sewing stretch fabrics․ Adjust stitch width and length according to your project needs; wider stitches are ideal for edge finishing, while narrower stitches suit stretch materials․
Experiment with different zigzag patterns for unique decorative effects․ When working with knits, a narrow zigzag allows the fabric to stretch without breaking the seam․ For appliqué, a zigzag stitch securely attaches fabric pieces․ Remember to test stitch settings on scrap fabric before applying to your final project․ Proper tension adjustment is crucial for a balanced zigzag stitch, preventing puckering or looping․
Adjusting Stitch Length and Width
Mastering stitch length and width control is key to successful sewing with your Kenmore 385․ The stitch length dial determines the distance between each stitch; shorter lengths create denser, stronger seams, ideal for heavy fabrics or stress points․ Longer lengths are suitable for basting or lightweight materials․
The stitch width dial controls the side-to-side deviation of the needle, primarily affecting zigzag stitches․ Wider widths create broader zigzag lines for decorative purposes or stretch applications․ Narrower widths offer a more subtle zigzag, useful for reinforcing seams․ Always test adjustments on scrap fabric to achieve the desired result before sewing your project․ Consistent tension is vital when altering these settings․
Using Different Presser Feet
Expand your sewing capabilities with the variety of presser feet compatible with the Kenmore 385․ The standard zig-zag foot handles most everyday sewing tasks․ A buttonhole foot simplifies creating professional-looking buttonholes․ A zipper foot allows precise stitching close to zipper teeth․
Furthermore, a satin stitch foot provides a smooth finish for decorative stitches․ Consider a rolled hem foot for delicate fabrics and a blind hem foot for invisible hems․ Correct foot selection significantly impacts stitch quality and fabric handling․ Ensure the foot is securely attached before beginning any sewing operation․ Experiment with different feet to unlock the full potential of your machine․
Troubleshooting Common Issues
Resolve frequent problems like the machine not turning on, thread breakage, skipped stitches, and needle breakage with our diagnostic guide and solutions․
Machine Won’t Turn On – Possible Causes
If your Kenmore 385 fails to power on, several factors could be at play․ First, verify the power cord is securely connected to both the machine and a functioning electrical outlet․ Test the outlet with another device to confirm it’s providing power․
Next, check the machine’s internal fuse․ A blown fuse is a common culprit․ Refer to your manual for the fuse location and replacement instructions – never substitute with a different amperage fuse․
Inspect the foot control for damage or loose connections․ Try a different foot control if available․ Finally, examine the on/off switch itself; it may be faulty and require professional repair․ A qualified technician should handle any internal electrical repairs․
Thread Breakage Problems and Solutions
Frequent thread breakage on your Kenmore 385 can be frustrating, but often has a simple fix․ Ensure proper threading – follow the manual’s diagram meticulously, checking that the thread is seated correctly in all guides and tension discs․
Use the correct thread type and size for your fabric․ A mismatch can cause excessive friction․ Verify the needle is appropriate for the thread and fabric combination; a dull or incorrect needle is a common cause․
Adjust the thread tension․ Too-tight tension strains the thread․ Check for burrs or damage on the bobbin case or thread guides․ Finally, ensure the spool is rotating freely and isn’t creating drag․
Skipped Stitches – Diagnosis and Fixes
Skipped stitches on your Kenmore 385 often indicate a problem with the needle, threading, or timing․ First, re-thread the machine, both the upper thread and the bobbin, ensuring correct placement in all guides and tension discs․ Confirm the needle is correctly inserted – it should be fully seated and facing the right direction․
Use the correct needle type and size for your fabric․ A dull or damaged needle is a frequent culprit․ Check the needle’s eye for burrs․ Adjust the presser foot pressure; insufficient pressure can cause skipped stitches․
Inspect the timing (though this may require professional assistance)․ Finally, ensure you’re using quality thread․
Needle Breakage Prevention
Preventing needle breakage on your Kenmore 385 is crucial for smooth sewing and avoiding machine damage․ Always use the correct needle type and size for the fabric you’re working with – heavier fabrics require stronger needles․ Ensure the needle is fully inserted into the needle clamp and securely tightened;
Avoid pulling or pushing the fabric while sewing; let the feed dogs do the work․ Never sew over pins, as this is a common cause of breakage․ Regularly check the needle for any signs of bending, dullness, or damage, replacing it promptly if needed․
Proper threading is essential; incorrect threading can strain the needle․
Maintenance and Care
Ensure longevity with regular oiling, cleaning of the feed dog and hook, scheduled maintenance, and proper storage for your Kenmore 385 sewing machine․
Oiling and Lubrication Guide
Proper lubrication is crucial for maintaining the smooth operation and extending the life of your Kenmore 385 sewing machine․ Refer to your specific model’s manual for designated oiling points, as variations may exist․ Generally, key areas include the bobbin case, hook assembly, and any moving parts exhibiting friction․
Use only sewing machine oil – never household oil or grease – to prevent gumming and damage․ After removing the needle plate, carefully clean the feed dog and hook area before applying a few drops of oil to these components․ Operate the machine slowly several times to distribute the lubricant․
Avoid over-oiling, as excess oil can attract lint and dust․ Wipe away any spills immediately․ Regular oiling, combined with consistent cleaning, will ensure optimal performance and prevent premature wear on your Kenmore 385․
Cleaning the Feed Dog and Hook Area
Regular cleaning of the feed dog and hook area is essential for preventing lint buildup, ensuring smooth fabric feeding, and maintaining stitch quality on your Kenmore 385․ Begin by disconnecting the power supply․ Carefully remove the needle plate, providing access to these critical components․
Use a small brush, or compressed air, to remove lint, thread scraps, and dust from the feed dog teeth and the surrounding area․ A lint roller can also be effective․ Inspect the hook area for any accumulated debris and gently brush it away․
Avoid using sharp objects or solvents, as these can damage delicate parts․ After cleaning, apply a few drops of sewing machine oil (refer to the oiling guide) before reassembling the needle plate․ Consistent cleaning contributes significantly to the longevity and performance of your machine․
Regular Maintenance Schedule
To ensure optimal performance and longevity of your Kenmore 385 sewing machine, adhere to a consistent maintenance schedule․ After every 8 hours of use, brush away lint from the bobbin area and feed dogs․ Monthly, oil all designated lubrication points as detailed in the oiling guide, and thoroughly clean the machine, including the hook area․
Every six months, inspect the belt for wear and tear, and replace if necessary․ Check the needle and presser feet for damage, replacing them as needed․ Annually, consider a more comprehensive cleaning, potentially including professional servicing if you’re uncomfortable with disassembly․
Consistent maintenance prevents issues, extends the machine’s life, and guarantees consistently high-quality sewing results․ Keep a log of maintenance performed for easy tracking․
Storage Recommendations
Proper storage is crucial for preserving your Kenmore 385 sewing machine’s condition․ Always cover the machine with a dust cover to protect it from dust, debris, and potential damage․ Store it in a cool, dry place, away from direct sunlight and extreme temperatures․ Avoid storing in damp basements or humid attics․
Before long-term storage, ensure the machine is thoroughly cleaned and oiled․ Remove the needle and any attachments, storing them separately in a safe place․ Do not store the machine with thread left in it, as this can attract dust and potentially damage the tension discs․
Consider the original packaging if available, providing excellent protection․ Regular checks during storage will ensure it remains ready for use․
Advanced Techniques (Based on Available Information)
Explore fabric-specific needle selection and troubleshooting guides for optimal performance with your Kenmore 385, alongside a detailed parts diagram overview․
Understanding Different Fabric Types and Needle Selection
Choosing the correct needle is crucial for successful sewing with your Kenmore 385․ Lightweight fabrics like chiffon or silk require fine needles (size 60/8 or 70/10) to prevent snagging and runs․ Medium-weight cotton, linen, and denim benefit from universal needles (size 80/12 or 90/14)․
Heavier materials, such as canvas or upholstery fabric, demand stronger needles (size 100/16 or 110/18)․ Ballpoint needles are ideal for knit fabrics, preventing skipped stitches by gently separating the loops․ Stretch needles are specifically designed for highly elastic fabrics like spandex or Lycra․
Always refer to thread type recommendations alongside fabric choices․ A troubleshooting guide assists in diagnosing issues related to incorrect needle selection, ensuring optimal stitch quality and preventing damage to both fabric and machine․
Troubleshooting Guide for Sewing Machine Problems
Encountering issues with your Kenmore 385? This guide offers solutions for common problems․ If the machine won’t turn on, check the power cord and ensure it’s securely plugged in․ Thread breakage often stems from incorrect threading, tension imbalances, or a dull needle․ Skipped stitches can indicate a bent needle, incorrect needle size for the fabric, or improper timing․
Needle breakage is frequently caused by forcing the fabric, using the wrong needle type, or hitting a pin․ Regularly cleaning the feed dog and hook area prevents lint buildup, a common cause of malfunctions․ Consult the manual for detailed diagrams and step-by-step instructions for resolving these and other sewing challenges․
Kenmore 385 Parts Diagram Overview
Understanding the Kenmore 385’s components is crucial for maintenance and repair․ Diagrams illustrate the placement of key parts like the spool pin, bobbin winder, tension discs, presser foot, needle clamp, feed dogs, and the shuttle hook assembly․ These visuals aid in identifying parts during troubleshooting or when replacing worn components․
The diagram also highlights the stitch selection mechanism and the motor housing․ Referencing the parts diagram alongside the user manual simplifies tasks like threading, cleaning, and oiling․ Locating specific parts becomes easier, enabling efficient repairs and ensuring your Kenmore 385 continues to operate smoothly․ Detailed illustrations are available within various manual resources․